Homemade Dill Dip and Onion Dip

IMG_9421 (3)

Hello!  I don’t usually address anything going on in the outside world in my posts, but thought it would be disingenuous at this point not to, considering that we are all affected in some shape, or form, by this pandemic.  What kinds of things are you doing to productively fill your time due to social distancing?

My kids are all working on their digital learning from school, I’ve been deep cleaning so we can sell our house (we are getting ready for a big move to North Carolina!), we’ve been watching a lot of NCIS reruns, and I’ve been making more recipes than ever since we’ve been eating at home.

Which brings me to the recipe that I’m going to share with you today.  It’s from my sister in law (Lisa) – she makes this dip, and it’s a family favorite.  It kind of reminds me of an herbaceous onion dip (see below for an onion dip variation!).  Spice Islands makes the beau monde seasoning, but I don’t have access to it where I live, so I make my own (see recipe below).  The Beau Monde seasoning recipe makes enough for multiple batches – maybe 6 or so?

Feel free to substitute all Greek yogurt (in place of the sour cream), or just use all sour cream.  I personally prefer higher fat percentages in my dairy products because a lot of them have less sugar than lower fat versions, and I like the flavor, but use what you like!

One of the best things about the Dill Dip is that you can mix it and serve it right away.  However, Lisa prefers to mix it in advance so the flavors deepen.  I’ve had it both ways, and it’s always great!  Please note that the Onion Dip does require at least 30 minutes of refrigeration to soften the minced onions before serving.

Dill Dip Adapted from my sister in law Lisa

1/2 cup plain Greek yogurt (I like Fage)

1/2 cup sour cream

1 cup Hellman’s Mayo

1 Tablespoon dill weed

1 1/2 teaspoons Beau Monde seasoning (see recipe below)

1 1/2 teaspoons onion powder

Whisk everything together and store covered in the refrigerator up to 5 days.  Serve with potato chips, sliced sweet peppers, cucumbers, or carrots.

Homemade Beau Monde Seasoning Adapted from internet searches

2 Tablespoons onion powder

2 Tablespoons celery seed

2 Tablespoons coarse kosher salt

1 Tablespoon sugar

Mix all ingredients together, store in a jar with a lid in the pantry (or spice cabinet).  Shake before using!

Onion Dip

1/2 cup plain Greek yogurt (I like Fage)

1/2 cup sour cream

1 cup Hellman’s Mayo

1 1/2 Tablespoons dried minced onions

1 1/2 teaspoons Beau Monde seasoning (see recipe above)

1 1/2 teaspoons onion powder

Mix altogether and store covered in the refrigerator for up to 5 days.  The dried onions need about 30 minutes to soften in the dip before serving.


Chicken Parmesan Soup

img_8221

I am always late to the party.  Well, figuratively anyway.  I had my first margarita at 21, and disliked it, so I didn’t try another for at least another decade, at which point I had the best orange/lime margarita at a restaurant.  Then there’s tea.  I just started drinking this Caramel Vanilla Cuppa Cake Tea (which I highly recommend), but I have to have a cookie in order to drink it.  Weird, I know.

And nope.  I can’t do coffee either, unless it’s some heavy sugar and cream concoction, but by then, maybe it’s not really coffee anyway?  And I have never had chicken parmesan.  It just wasn’t served at my house, and I have been trained (shamed?) into not ordering Italian food at restaurants.

And then there’s soup.  I just starting eat soup within the last year.  Gasp!  So when I tell you that this soup is really good – I mean it.

It also comes together really quickly – so there’s that.  I think grating the Parmigiano-Reggiano takes the most time.  And no, you shouldn’t substitute any other brand of parmesan cheese.  I do recommend grating ahead of time, and storing the grated cheese in a deli container in your freezer until you’re ready to use it.

Below, you’ll notice that I’m oddly specific about a certain brand of product that I use, because at the end of the day, those products will make a difference in how the final dish tastes.  For instance – I’ve already discussed Parmigiano-Reggiano cheese, I also prefer to purchase DeCecco pasta – it takes longer to cook and has the best al dente bite to the cooked pasta.  I also highly recommend Cento tomatoes.

Also, feel free to halve this recipe, because it makes a lot.  Because when I say it serves 10-12, I mean it’s enough for 10-12 people to eat, and have seconds.

So, if I haven’t scared you off yet – here’s the recipe!  One more thing, I make my own stock so it’s not high in sodium.  If you use a store brand, use caution adding the amount of salt that I listed.  Meaning, please taste your soup before adding salt, it probably won’t require as much as I have listed!

Chicken Parmesan Soup Adapted from Delish: Eat Like Every Day’s the Weekend

Serves 10-12

1 Tablespoon olive oil
1 large onion, roughly chopped
3 cloves garlic, roughly chopped
1/8 teaspoon red pepper flakes
1 -28 ounce can crushed tomatoes (Cento)
1 – small can of tomato paste
8 ounces chicken stock
6 cups water
1 – 2 Tablespoons fresh basil
16 ounces penne pasta – cooked about 10 minutes (it’ll continue to cook in soup)
2 cooked chicken breasts, cut into chunks
1 block of fresh mozzarella cheese (use half in soup, garnish with the other half)
1 cup freshly grated Parmigiano Reggiano, using a microplane grater*
¼ cup sugar
Salt – about 3 ½ teaspoons coarse kosher salt (to taste)
1 teaspoon freshly ground pepper (about 75 grinds)
1 Tablespoon fresh parsley

In a large pot – boil water and cook pasta for 10 minutes.

In another large pot, saute onion and olive oil just until starting to get tender (I like a little firmness in the onion). Stir in the garlic, red pepper flakes, chicken stock, tomatoes, tomato paste, water, sugar, and basil. Cook until boiling. Stir occasionally. Stir in the Parmigiano Reggiano cheese.

Taste, and season with salt and freshly ground pepper.

Just before serving, add in the (mostly) cooked pasta, the chunks of chicken, and the fresh parsley. Top the soup with half the mozzarella cheese, and stir. Ladle into bowls, and serve with extra mozzarella cheese.

Enjoy with a nice thick slice of Italian bread!  Store any leftovers in a covered container in the refrigerator for about 5 days.

*If you use a coarse grater (or a food processor) for the Parmigiano Reggiano, use 1/2 cup.

Almond Butter Chocolate Chip Cookies

IMG_9320 (2)

These cookies!  Oh my goodness, these cookies are so delicious!  I was initially attracted to them because they’re naturally gluten free, and filled with almonds and chocolate – two of my favorite things.

On the first day you bake them, they’re crispy on the edges and chewy in the center.  By the third day, they’ve softened up almost completely, and are more chewy than crispy.  Be sure to keep them in a covered container – the more air they’re subjected to, the sooner they lose their crispiness.

Either way, they’re delicious with a cold glass of milk, and they’re naturally gluten free.  Yay you!

This recipe makes 12 cookies if you use a #24 disher.

Almond Butter Chocolate Chip Cookies Adapted from Dessert for Two

4 Tablespoons unsalted butter, softened

1/2 teaspoon coarse kosher salt

3/4 cup dark brown sugar, packed

1/3 cup almond butter (I used Sam’s Choice Slow Roasted Creamy Almond Butter)

1 egg

1 teaspoon vanilla

3/4 teaspoon baking powder

1/4 teaspoon baking soda

1 1/4 cups almond flour (I used Bob’s Red Mill Superfine Almond Flour)

1 cup semisweet chocolate chips

Preheat the oven to 350 degrees.  Line 2 baking pans with parchment – set aside.

In a medium bowl, beat together the first 4 ingredients until creamy, and fluffy – about 2-3 minutes.  Add in egg, vanilla, baking powder, and baking soda – beat until combined.

Add in the almond flour and beat until combined.  Stir in the chocolate chips.  Then using the #24 disher, scoop cookies onto parchment-lined baking sheets.

Bake for 18-20 minutes, or until golden brown – the longer they cook, the crispier the edges are.  Let cookies cool completely on the hot baking sheet – about 30 minutes.  When cool, store in a covered container for 3-4 days.

Enjoy!

Thick & Chewy Chocolate Chip Granola Bars

IMG_7617 (2)

Ugg.  Processed food.  Why do we love you so much?!  Maybe it’s because all the chemicals make foods shelf stable so they last for an incredibly long time – sometimes years!  I mean, is it just me, or do raspberries seem to go bad like 3 days after buying them?!

That doesn’t seem to stop me though – I swear every single time I’m at Walmart, I make a detour to look at the raspberries, and smell them.  And if they’re beautiful, and they smell like a raspberry, I buy them.  I can’t help it.  I think my kids are starting to worry about me.

Thick & Chewy Chocolate Chip Granola Bars  Adapted from Rachael Ray

1/2 cup salted butter (or unsalted with 1/2 teaspoon coarse kosher salt)

1/2 cup light karo syrup, or clover honey

2/3 cup light brown sugar, packed

4 cups quick cooking oats

2 cups crispy rice cereal

1 teaspoon vanilla

1-1 1/2 cups mini chocolate chips

Prepare a 13 x 9 1/2 inch pan by lining it with foil and spraying the foil with nonstick spray.  Set aside.

In a large mixing bowl, stir together the oatmeal and rice cereal.  Set aside.

In a medium pot (on medium high heat), place the butter, karo syrup (or honey), and the brown sugar and stir the ingredients until it comes to a boil.  Then let the mixture cook for 2 minutes, take off the heat and stir in the vanilla.

Pour the butter mixture over the cereal mixture and stir until the cereal is evenly coated with the butter mixture.

Toss in about 1 cup of the mini chocolate chips – they will start to melt a bit.  But go ahead and spoon the mixture into the prepared pan.  Then spray the bottom of a flat glass (or measuring cup) to press the mixture down into the pan.  Then top the bars with the remaining 1/2 cup of mini chocolate chips, and tamp those down onto the cereal bars; spraying the bottom of the glass as needed to prevent anything from sticking.

Let the bars cool for 2-3 hours, or until the chocolate is no longer melted.  Then cut into bars, and store covered for about a week at room temperature.

Enjoy!


Better Than Red Lobster Cheddar Bay Biscuits

img_8413 (2)

Cheddar Bay Biscuits are one of the top reasons that people go to Red Lobster.  Am I right?!  The only down side is that the restaurant ones seem to dry out super fast.  Such a bummer.

With this recipe, you’ll be able to whip up your own cheddar biscuits whenever you want!  These biscuits are dense, buttery and cheesy, garlicky and they’re just as good hot from the oven, as they are at room temperature.  And they’re so soft and moist you guys! Ugg, I want one right now!  With loads of shrimp!  But I digress.

If you don’t plan on eating them within an hour of pulling them out of the oven, I recommend refrigerating any leftover biscuits in a covered container.  These also freeze incredibly well.  Just warm them up in the microwave on defrost for about 20-30 seconds.

Better Than Red Lobster Cheddar Bay Biscuits Adapted from Damn Delicious

2 cups flour

1 Tablespoon sugar

1 Tablespoon baking powder

2 teaspoons garlic powder

1/2 teaspoon coarse kosher salt

1 teaspoon old bay seasoning

1 cup buttermilk

2/3 cup heavy cream

1/2 cup cold unsalted butter, cut into cubes

1 1/2 cups mild (or sharp) shredded cheddar cheese*

Topping:

3 Tablespoons salted butter, melted

1 Tablespoon chopped fresh parsley, or 1/2 teaspoon dried

1/2 teaspoon garlic powder

Preheat the oven to 450 degrees.  Line a quarter sheet pan with parchment and spray with nonstick spray.  Set aside.

In the bowl of a food processor, combine the first 6 ingredients.  Pulse to combine.  Then add in the 1/2 cup of cold butter cubes into the dry ingredients and pulse until the butter is roughly the size of small peas.

Pour the mixture into a large mixing bowl, and toss the shredded cheese with the flour mixture.  Then pour in the buttermilk and heavy cream; stir just until combined.

Use a 2 ounce scoop (or 1/4 cup), to scoop the biscuit dough onto the prepared pan.  I was able to cram 12 of them onto the pan.  They will spread as they bake, and I don’t mind them touching, because that keeps the edges from completely drying out.  If that bothers you, use a larger pan or cookie sheet and space them out.  Either way, bake them for about 15-20 minutes, or until light brown on top.

In a small microwave-safe bowl, melt the salted butter and stir in the garlic and parsley.  Set aside.

When the biscuits are done, take the pan out of the oven and brush the tops of the biscuits with the melted butter mixture.  Using as much, or as little, as you’d like.  I always use the entire amount of melted butter on the biscuits!

Enjoy!

*Buy a block of cheese and shred it yourself – the bagged shredded cheese has a coating that prevents the cheese from melting well in your baked goods.

Oatmeal Chocolate Chip M&M Cookies – Naturally GF

IMG_8818 (2)

If you are into gluten free baking, or if you’re just interested in a healthy-ish chocolate stuffed cookie – then these are for you!

They’re buttery, crispy on the edges, chewy in the middle, filled with wholesome oats, and chocolatey goodness.  I actually think they could pass for breakfast.  😉

In all honesty, my favorite chocolate chips cookies are still these, but when I’m in a hurry or just craving a healthier version, these are my go to.  Let me know if you try them!

Oatmeal Chocolate Chip M&M Cookies Adapted from Gourmet Holiday Magazine

Makes approx. 18 cookies

2 1/4 cup old-fashioned oats

1 Tablespoon cornstarch

1/2 teaspoon baking powder

1 stick of unsalted butter, slightly softened

1/3 cup sugar

1/3 cup light brown sugar, packed

1 egg

1 teaspoon vanilla

1/2 teaspoon coarse kosher salt

1 cup semisweet chocolate chips, or chocolate chunks

2/3 cup regular M&M’s

Preheat the oven to 375 degrees.

In a medium bowl, beat the butter with the sugars until fluffy.  Beat in the salt, baking powder, and vanilla until combined.  Beat in the egg.  Set aside.

In a food processor (I use my mini one for small jobs like this), add 1 1/4 cups of oats and the cornstarch, and grind until the oats are fine – about 30 seconds or so.  Stir the ground oats, plus the remaining 1 cup of regular oats, into the batter.

Add in the chocolate chips and the M&M’s – feel free to use more, or less, depending on your preference.  Stir until combined.

Using a 1 1/2 Tablespoon cookie dough scoop – scoop the cookie dough onto baking sheets lined with parchment.  Bake for 15-16 minutes, or until the cookies have spread and are brown around the edges.  I get 6 cookies onto an average sized baking sheet.

Let cool and enjoy!  These keep for about 4 days in a covered container at room temperature.

Norwegian Pancakes

img_8552 (2)

My kids love Norwegian Pancakes so much that one batch is never enough!  They’re like a crepe, but slightly thicker.  We like to fill them with Nutella and top them with berries and powdered sugar, but they’re equally good with triple berry filling.

Feel free to halve the recipe – the one listed below makes over 20.  I like to make them on the weekend for busy weeks.  I just cook them, stack them on top of each other on a plate, and cover them with plastic wrap once they’ve cooled a bit – then store them in the refrigerator.  On school days, the kids just heat them on defrost in the microwave for about 10 seconds and swipe on a layer of Nutella or jam, roll them up, and eat breakfast!

They don’t stay warm for long, but luckily, they’re equally tasty at room temperature!

Norwegian Pancakes Adapted from Twist It Up

6 large eggs

3 cups whole milk

2 cups flour

2 teaspoons sugar

1 teaspoon vanilla

a large pinch of salt

Heat a nonstick 10 1/2 inch skillet on medium high heat (5/6) on the stove.  Let it continue to heat while you make the batter – the pan will need at least 5-8 minutes to heat up.

In a high powered blender – blend all the ingredients until smooth.  Scrape the sides, then blend again.

When the skillet is ready, spray it with nonstick spray, then pour about 1/4 cup of pancake batter into the center of the pan – then using the pan’s handle, lift the pan off the burner and make a rotating wrist motion to spread the pancake batter along the entire bottom of the pan.

Place the skillet back on the burner, and cook for 30 seconds to 1 minute per side.  If your pan was not hot enough, the pancake may take significantly longer to cook.

You can tell when the pancake is ready to flip because the edges will be light brown and lacey, and only the center will have wet batter in the middle.  To flip – take a thin nylon scraper and gently loosen an edge under the pancake, insert a heat resistant turner underneath, and flip.  I only have to use nonstick spray once per pancake!

Repeat with remaining batter, being sure to spray the pan before starting a new pancake.

Enjoy!

My Grandma’s Best Vinaigrette

img_7968 (2)
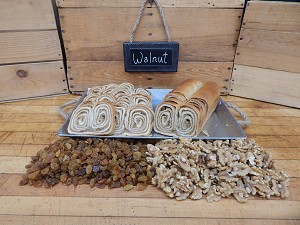
My Grandmother passed away about a year and a half ago.  Since then, I’ve been trying to decipher/recreate her recipes.  It’s been quite the task, let me tell you!  In one recipe, there’s a list of ingredients (complete with measurements, whew!), but the instructions were simply – “to make a regular dough.”

Then there were some things that completely lacked a recipe at all – like her famous vinaigrette.  If you had asked her, she probably would have told you that you just shake some olive oil, some vinegar, and then salt & pepper to taste.  All the while, watching your greens become all wilted from the olive oil and vinegar while you try to figure out just how much salt and pepper you think you need.

Honestly, that’s too much pressure!  Who’s got time for that?!  Definitely not me, so I’ve got you covered.  Here’s the no-fail recipe, with bare minimum ingredients for the best vinaigrette.  I like to use it as a dressing for cucumbers and onions (as seen above), or with any type of mixed greens.  I know it sounds too simple to be delicious, but it truly is!

Enjoy!

My Grandma’s Best Vinaigrette Adapted from Carm

1 cup olive oil (I use Lucini)

1/2 cup Prosecco wine vinegar (or any white or red wine vinegar you like)

1 teaspoon dried oregano

1 1/2 teaspoons coarse kosher salt

a few grinds of freshly ground pepper

Whisk together all the ingredients and store in a covered carafe in the refrigerator.  Shake before using, always!  Store in the refrigerator a good month.

Just a note – the olive oil will eventually harden from cold storage in the refrigerator, just place the bottom of the carafe in a bowl of warm water and shake after about 5-10 minutes – just before using.  Or simply run warm water over the bottom of the carafe until the olive oil becomes liquid again, and shake really well before using.


Some of My Favorite Christmas Gift Ideas

Gardenaire Spices DSC_0342.JPG

Photo Source: Gardenaire.co

Eek!  I’m so super excited to tell you about these spices.  In fact, truth be told, I’ve been holding out on you – for the last year.  I know, I know, I just wanted to keep them all to myself, but they truly are so great that I must finally share them with you!

This company is owned by a mother/daughter duo who grow their own herbs, and make the most amazing spice mixes – with fabulous names (Biking Through Burgundy, Love in a Tuscan Kitchen, Painted Desert, etc.).  I actually visited their hometown of Rochester, MN and stumbled upon these yummy spices at my favorite cooking store – Cook’s Pantry (which I discovered has closed!).

On Gardenaire’s website they have suggestions for how to use each of the spice mixes, and some recipes.  But what the heck, buy one of each – you won’t be sorry!  And while you’re at it, buy a few for your friends too.

If spices aren’t your thing (what?!) -they also carry a line of shrub mixes, infused syrups, teas, marshmallows, and drinking chocolate.  I think I’m going to add a few to my next shopping cart, and who knows, maybe something will actually make it to someone else as a gift, but I’m not making any promises!

Let me know if you’ve tried any of their products and have a suggestion for me!

Multicolor Kitchen Utensil Set

Photo Source: Pampered Chef

This versatile, and very colorful, set of kitchen tools is so much fun.  It’s perfect for anyone who likes a little color in their kitchens.  Of course, they’re dishwasher safe, and heat resistant up to 428 degrees.  However, I don’t use mine on the stove (so I can’t attest to how they stand up to heat) I bought them specifically to use for serving.

Source: Mauro Farms

When asked if you want potica, the answer is always “yes.”  Except if the question is about including raisins – then it’s a “no.”  Yes to walnuts, no to raisins.  Pretty simple!  And aside from making it yourself – this is the best place to order it from.  They ship it fast, and fresh – be sure to order the 2 pound loaf.  Trust me, you’ll want to be sure to get a slice!

Source: Portland Apron Company

This is a great company to work with (I may have had some trouble deciding on the right size, and they were quick to help me out), and their super comfy aprons are fantastic.  They’re easy to throw on, wash, and run errands in.  They’re also fabulous to cook and clean in – especially if you’re like me and have rough counter tops that wear holes into your clothes.  Aprons are a must!

Source: Amazon

I use knives all the time, and sometimes, I just don’t want to get out the expensive ones to do a small job – like slice a banana, or cut a sandwich in half.  That’s what I use these babies for – they’re dishwasher safe, super sharp, and very convenient. If you find these locally for a reasonable price, grab a handful! I store mine in a small ceramic utensil jar on the counter (to prevent cuts trying to grab them amongst other utensils in a drawer).  I’ve had them for years, and they’re still just as sharp as the day I bought them.
Source: Rose’s Botanicals

This is a shop that we discovered in Apalachicola, FL on our travels to Saint George Island.  We love their goat’s milk soap (the one pictured has a slice of sea sponge in it!), and their sea sponges.

Source: Etsy – George Scatchard Pots

Love, love, love these handmade bowls from George Scatchard Pots on Etsy.  I bought a huge one a few months ago, and it’s even more beautiful in person.  The bowls are heavy (in a very good way!), and fabulous!  He does a fantastic job packaging these beauties so that there’s no breakage – which I really appreciate.

Please look closely at measurements before purchasing so you know what size you’re ordering!

100 Gathered Thoughts Notepad - For the one i love - Sugarboo and Co

Source: Sugarboo & Co.

This store has a lot of everything.  But I mostly buy their fabulous notepads.  I am a notepad/journal junkie, and I really dig quotes, so this is just about my favorite one!

Cultivate What Matters Make It Happen BundleSource: Cultivate What Matters

I bought this for myself this year as an early Christmas present.  I’m not the only one that does that, am I?!  I wasn’t even sure if I was going to crack it open and write in it, because it’s so darn pretty, with nice paper, and stickers!  But I did it, and I love it.

It’s not like a regular calendar, or planner.  It’s a cross between a journal, a guided study, and a goal brainstorming workbook.  The first 60+ pages are guided journaling to help you uncover your goals, and work your way through achieving them monthly.  I wanted to get a head start on that, so that in January I could hit the road running (so to speak).

It’s funny to me, that for years I give the same basic laundry list of general goals – walk more, lose weight, eat better, be more patient, get Christmas gifts wrapped early, etc.  But I never get past just listing them – I’m realizing that’s because there was no plan of action.  No wonder they haven’t exactly worked out.  Sheesh!  So this year, I’m hoping that with the help of this workbook, I’ll be able to work towards at least a few of my goals, or at the very least keep them at the forefront of my mind so I have a shot at holding myself accountable!

Happy Shopping!  Let me know what your favorite finds (and gifts to give) are this season!

Individual Hot Chocolate Cakes

IMG_7550 (3)

This has got to be the perfect dessert.  It’s warm and gooey, fudgy and dense, creamy and tart –  and it’s super fast to whip up.  Promise me that when you make these, you’ll absolutely serve them with vanilla ice cream and (if you have them) fresh raspberries, and/or strawberries?!  Or forget the berries, you need the ice cream!

Definitely, a big scoop of ice cream.

One other small detail – I used these ramekins to bake the hot chocolate cakes in.  I actually bought them awhile ago, because why not (insert husband rolling eyes)?!  While they’re no longer available at my local Walmart (it’s probably safe to say that they’re not available at yours either) – you’ll need to order them online.

I highly recommend these particular ramekins, because (1) I used them for this recipe, (2) they’re heavy duty, and (3) dishwasher safe (yay!).  However, if you have something else, you can still give the cakes a try, but remember you may have to make adjustments to the baking time.  For the record, these ramekins are 7 ounces each.

Let’s make these babies!

Individual Hot Chocolate Cakes Adapted from Love in a Tuscan Kitchen

6 ounces semisweet chocolate (I used Baker’s)

10 Tablespoons unsalted butter

3 eggs

1/2 cup sugar

1/2 teaspoon salt

1 teaspoon vanilla

1/2 cup flour

1 Tablespoon dark cocoa powder (I used Cacao Barry Brute)

Preheat the oven to 350 degrees.  Place 6 (7 ounce each) ramekins on a rimmed quarter baking sheet – set aside.

In a medium (microwave safe) bowl, place the chocolate and butter, and microwave for about 1 1/2 to 2 minutes – just until almost melted.  Stir the mixture until combined and completely melted.  Set aside to cool slightly.

In the bowl of a stand mixer, use the whisk attachment to beat the eggs and sugar on high speed for 4 minutes (set your timer!).  The mixture will be light colored, and slightly full and creamy looking.

Turn the machine to a lower-medium speed (about 4), and continue to beat the egg mixture while adding the salt and vanilla.  Then carefully pour the warmed chocolate mixture in a steady stream into the egg mixture.  Once all the chocolate mixture has been added, increase the speed of the mixer to about an 8 to make sure everything is combined.

Then remove the bowl from the mixer, and add in the flour and cocoa powder.  Whisk just until smooth.

Spray each ramekin with nonstick spray, and then pour batter into each ramekin – leaving about a 1/2 an inch of space at the top.

Bake the cakes in the oven for 20-22 minutes, rotating pan halfway through the baking time.

When the tops of the cakes start to rise, and look set on the edges, but still have a slight shiny indentation in the center (see photo below), take them out and immediately run a nylon scraper (or knife) around the edges just to loosen the cakes, and plate each one.*

If some of the cakes bake faster than others, you can take the ramekins out individually to unmold, and continue to bake the others.  Just another bonus of baking them in individual ramekins!

IMG_7492 (2)

*If the cakes are left in their ramekins, they will continue to bake, and become set, and sad, and no longer gooey.  😦

Serve them with ice cream and fresh berries!

**If you are truly only making these for 2 people, that’s okay!  Just make sure to unmold all of the cakes onto a parchment lined baking sheet and refrigerate the remaining cakes.  These reheat nicely on defrost in the microwave (in about 30 seconds), and they’re still gooey and perfect!